
How to Make a Custom Name Bracelet with Letter Beads in 5 Minutes
Share
- How to Make a Custom Name Bracelet with Letter Beads in 5 Minutes
- DIY Custom Name Bracelet: A 5-Minute Craft with Letter Beads
- Essential Materials for Your Custom Name Bracelet
- Selecting the Right Beads for Your Bracelet
- Cording and Closure Options
- Step-by-Step Bracelet Assembly Process
- Measuring and Cutting Your Cord
- Arranging Your Design Before Stringing
- Stringing Techniques for Perfect Alignment
- Securing Your Bracelet with Professional Finishes
- Knot-Tying Techniques for Elastic Cord
- Adding Clasps for Non-Elastic Materials
- Customization Options for Unique Bracelet Designs
- Incorporating Color Themes and Patterns
- Adding Charms and Special Elements
- Frequently Asked Questions About Letter Bead Bracelets
- How do I prevent letters from flipping around on my bracelet?
- Can I wash or swim while wearing my letter bead bracelet?
- What's the ideal bracelet length for different age groups?
DIY Custom Name Bracelet: A 5-Minute Craft with Letter Beads
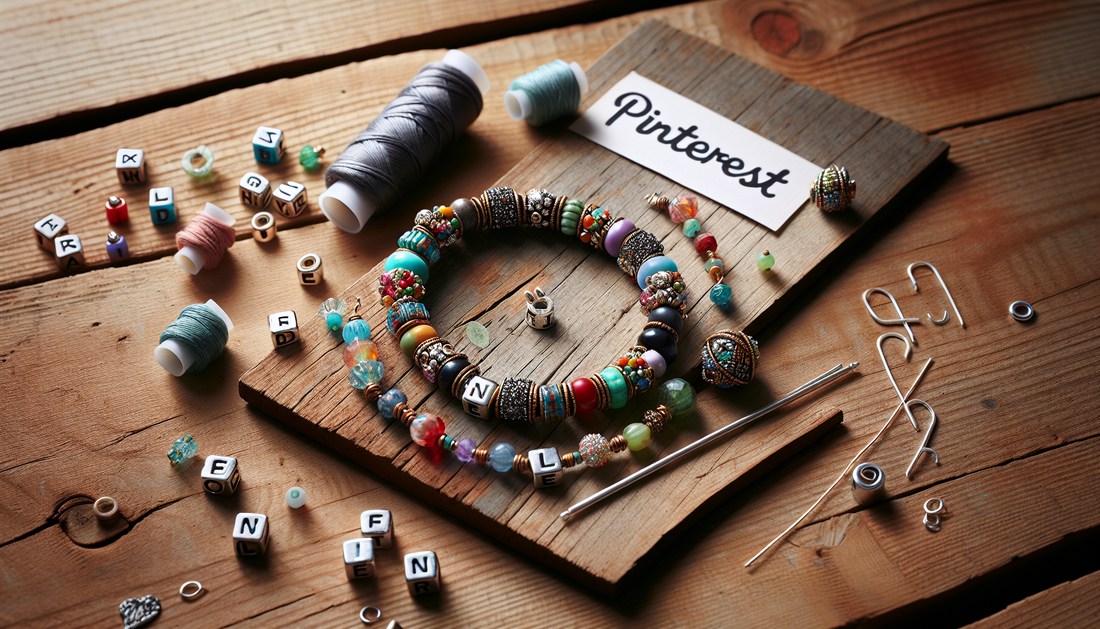
Creating personalized jewelry doesn't have to be complicated or time-consuming. With the right materials and a simple technique, you can craft a stunning custom name bracelet in just 5 minutes. These charming accessories make thoughtful gifts or stylish additions to your own collection. Whether you're using round letter beads, cube letter beads, or incorporating number beads, this quick project delivers professional-looking results without requiring advanced crafting skills.
Essential Materials for Your Custom Name Bracelet
Before diving into the creative process, gathering the proper supplies ensures a smooth crafting experience. The beauty of this project lies in its simplicity—with just a handful of basic materials, you'll be ready to create a personalized accessory that reflects your unique style or makes a meaningful gift.
Selecting the Right Beads for Your Bracelet
The cornerstone of any custom name bracelet is, unsurprisingly, the beads themselves. For this project, you'll need:
- Letter beads (either round letter beads or cube letter beads, depending on your preference)
- Number beads (optional, for incorporating dates or other significant numbers)
- Accent beads (complementary colors or textures to enhance your design)
- Spacer beads (small beads that create breathing room between letters or design elements)
When selecting beads for bracelet making, consider both aesthetics and practicality. Round letter beads offer a classic, fluid appearance, while cube letter beads provide a more contemporary, structured look. Many crafters find that cube beads also stay in position better, preventing your name or message from rotating around the wrist.
Cording and Closure Options
The foundation of your bracelet requires careful consideration. Your options include:
- Elastic cord (ideal for beginners—no clasps required)
- Beading wire (creates a more durable bracelet but requires closures)
- Hemp or cotton twine (for a natural, bohemian aesthetic)
- Leather cord (offers a rustic yet sophisticated finish)
For closure mechanisms, consider lobster clasps, toggle clasps, or magnetic clasps. Beginners might prefer elastic cording, which eliminates the need for complex closures altogether. The bracelet simply slips over the hand when stretched and contracts to fit comfortably around the wrist.
Step-by-Step Bracelet Assembly Process
With materials in hand, you're ready to transform simple components into a personalized accessory. This expedited process requires minimal time while still yielding professional results. The following systematic approach ensures your bracelet comes together quickly and beautifully.
Measuring and Cutting Your Cord
Begin by measuring your wrist or the wrist of your intended recipient. For elastic cord bracelets, cut a length approximately 1.5 inches longer than the wrist measurement to accommodate knot-tying and the slight contraction that occurs when beads are added. For beading wire or other non-stretchy materials, add 2-3 inches to allow for the closure mechanism.
If using beading wire, consider adding crimp beads to your supply list—these small metal beads are compressed with pliers to secure the wire ends, providing a professional finish and preventing beads from slipping off.
Arranging Your Design Before Stringing
Lay out your design before committing to stringing. This pre-arrangement stage proves invaluable for visualizing the final product and making adjustments. Consider these design approaches:
"Planning your bead arrangement before stringing prevents errors and saves time. A moment of preparation prevents countless moments of frustration."
When working with letter beads and number beads, experiment with these pattern options:
- Centered name with decorative beads on either side
- Name followed by a meaningful date
- Alternating letter beads with accent beads for a rhythmic pattern
- Multiple names separated by distinctive spacer beads
Stringing Techniques for Perfect Alignment
With your design established, begin stringing beads onto your chosen cord. If using elastic, secure one end with a temporary piece of tape to prevent beads from slipping off while you work. For beading wire, attach one end of your closure before stringing.
When working with letter beads, particularly cube letter beads, pay attention to the orientation of each letter. Thread them consistently so all letters face forward when the bracelet is worn. This meticulous attention to alignment elevates your creation from amateur to artisanal.
Securing Your Bracelet with Professional Finishes
The final stage of bracelet creation involves securing your work with appropriate finishing techniques. This crucial step ensures durability and comfort, transforming your strung beads into a wearable accessory that will withstand regular use.
Knot-Tying Techniques for Elastic Cord
For elastic cord bracelets, the surgeon's knot provides superior security. Execute this technique by:
- Bringing the two ends together
- Crossing the right end over the left to form a simple overhand knot
- Instead of completing with a single pass-through, pass the end through twice
- Pull tight, then repeat with another overhand knot
- Apply a tiny drop of jewelry glue to the knot for additional security
After the glue dries, trim excess cord approximately 2mm from the knot and gently tug the surrounding beads to conceal the knot between them.
Adding Clasps for Non-Elastic Materials
For beading wire or other non-stretchy materials, proper clasp attachment is essential. The process typically involves:
| Closure Type | Tools Required | Difficulty Level |
|---|---|---|
| Lobster Clasp with Jump Rings | Chain-nose pliers, crimp pliers | Beginner to Intermediate |
| Toggle Clasp | Round-nose pliers, crimping pliers | Intermediate |
| Magnetic Clasp | Crimping pliers | Beginner |
For the quickest finish, magnetic clasps offer the easiest application. Simply thread a crimp bead onto your wire, followed by one half of the clasp. Loop the wire back through the crimp bead, pull to desired tension, and compress the crimp bead with pliers. Repeat on the opposite end with the second half of the clasp.
Customization Options for Unique Bracelet Designs
While a basic name bracelet offers personal significance, exploring custom variations can elevate your creation. These adaptations introduce personality and distinction to your accessories, making them truly one-of-a-kind expressions.
Incorporating Color Themes and Patterns
Enhance your bracelet's visual appeal through thoughtful color selection and pattern implementation. Consider these approaches to chromatic customization:
- Ombré effects using gradually shifting hues of accent beads
- Monochromatic schemes with varying textures and finishes
- Alternating complementary colors for vibrant contrast
- Seasonal palettes that reflect holiday themes or natural elements
Letter beads themselves come in various colors. For a cohesive look, select letter beads that either match or intentionally contrast with your accent beads. Black or white letter beads offer timeless versatility, while metallic finishes introduce an element of sophistication.
Adding Charms and Special Elements
Elevate your custom name bracelet by incorporating meaningful charms or distinctive elements that reflect personal interests, milestones, or aesthetic preferences:
- Birthstone beads alongside number beads indicating birth dates
- Symbolic charms that represent hobbies, professions, or aspirations
- Initial pendants that complement spelled-out names
- Natural elements like tiny shells or polished stones
These supplementary components transform a simple name bracelet into a narrative piece that communicates deeper significance and personal history.
Frequently Asked Questions About Letter Bead Bracelets
How do I prevent letters from flipping around on my bracelet?
Letter beads, particularly round letter beads, may rotate during wear, causing your message to become illegible. To minimize this issue, consider using cube letter beads instead, as their shape naturally resists rotation. Alternatively, use slightly tighter tension when stringing round beads, or incorporate small silicone stoppers between letters to maintain position.
Can I wash or swim while wearing my letter bead bracelet?
Water exposure can deteriorate elastic cord over time and may affect certain types of letter beads, particularly those with painted or printed surfaces. Remove your bracelet before showering, swimming, or engaging in activities that involve extensive hand-washing. For increased water resistance, consider using coated beading wire with proper clasps instead of elastic cord.
What's the ideal bracelet length for different age groups?
Typical bracelet lengths vary by age and wrist size. Consider these general guidelines, adjusting as needed for individual preference:
- Children (ages 3-5): 5-5.5 inches
- Children (ages 6-10): 5.5-6 inches
- Teens: 6.5-7 inches
- Women: 7-7.5 inches
- Men: 8-8.5 inches
Remember to factor in the space occupied by beads, which may reduce the effective circumference by up to half an inch, depending on bead size and quantity.
With these techniques and customization options, you're well-equipped to create beautiful, personalized name bracelets in just minutes. This accessible craft offers endless possibilities for self-expression and gift-giving, proving that meaningful jewelry doesn't require extensive time or specialized training—just creativity and the right materials.